
Boat Project Log: Draining the Block and Finding Out What the Trailer Needs
The first workday on a Tahoe Q4 that's been sitting since 2015: draining the MerCruiser 3.0 block, documenting the engine, and an honest look at the trailer's rusted disc brakes.
Saturday was the first real workday on the Tahoe Q4, and it went better than I expected. The block is drained, the engine is documented, and I now have an honest list of what the trailer needs before this boat goes anywhere near the water.
The boat has been sitting a long time. Its registration lapsed in 2015, so I went in assuming nothing works and everything needs checking. That turned out to be the right attitude.
Draining the block
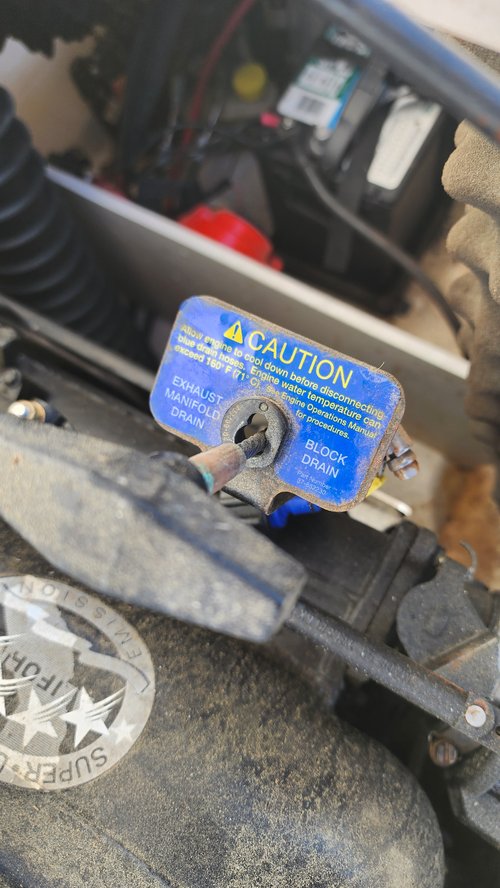
The first job was getting the water out of the engine. On this boat, everything goes through a blue drain bracket mounted on the engine. It has the exhaust manifold drain on one side and the block drain on the other, with blue hoses running to each.
Pull the hoses at the bracket and the water dumps into the bilge. From there it runs out through the transom drain plug. There's a caution label right on the bracket worth paying attention to: the water can run hotter than 160°F if the engine has been running, so let it cool first. Mine had been cold for years, so that wasn't a concern.
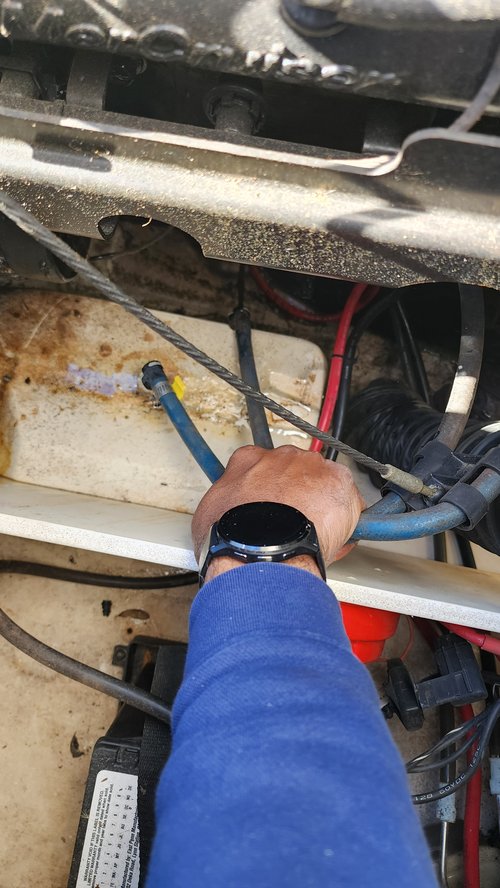
One tip: if a drain clogs, you need a stiff wire to poke it clear. I went to Lowe's for copper wire and found they don't sell it by the foot. A coat hanger or a length of galvanized steel wire does the same job. Keep one with the boat in case a drain clogs next time.
Getting to know the engine
While I was in the engine bay, I wrote down everything I'll need when ordering parts:
- Engine: MerCruiser 3.0 MPI ECT
- Built: July 2011
- Spark plugs: MR43LTS
- Plug gap: 0.045"
The 3.0 is the four-cylinder MerCruiser, and it's about as common as sterndrive engines get. That makes parts easy to find, which matters on a project like this. I also recorded the engine and drive serial numbers. You'll want those any time you order model-specific parts.
The trailer brakes
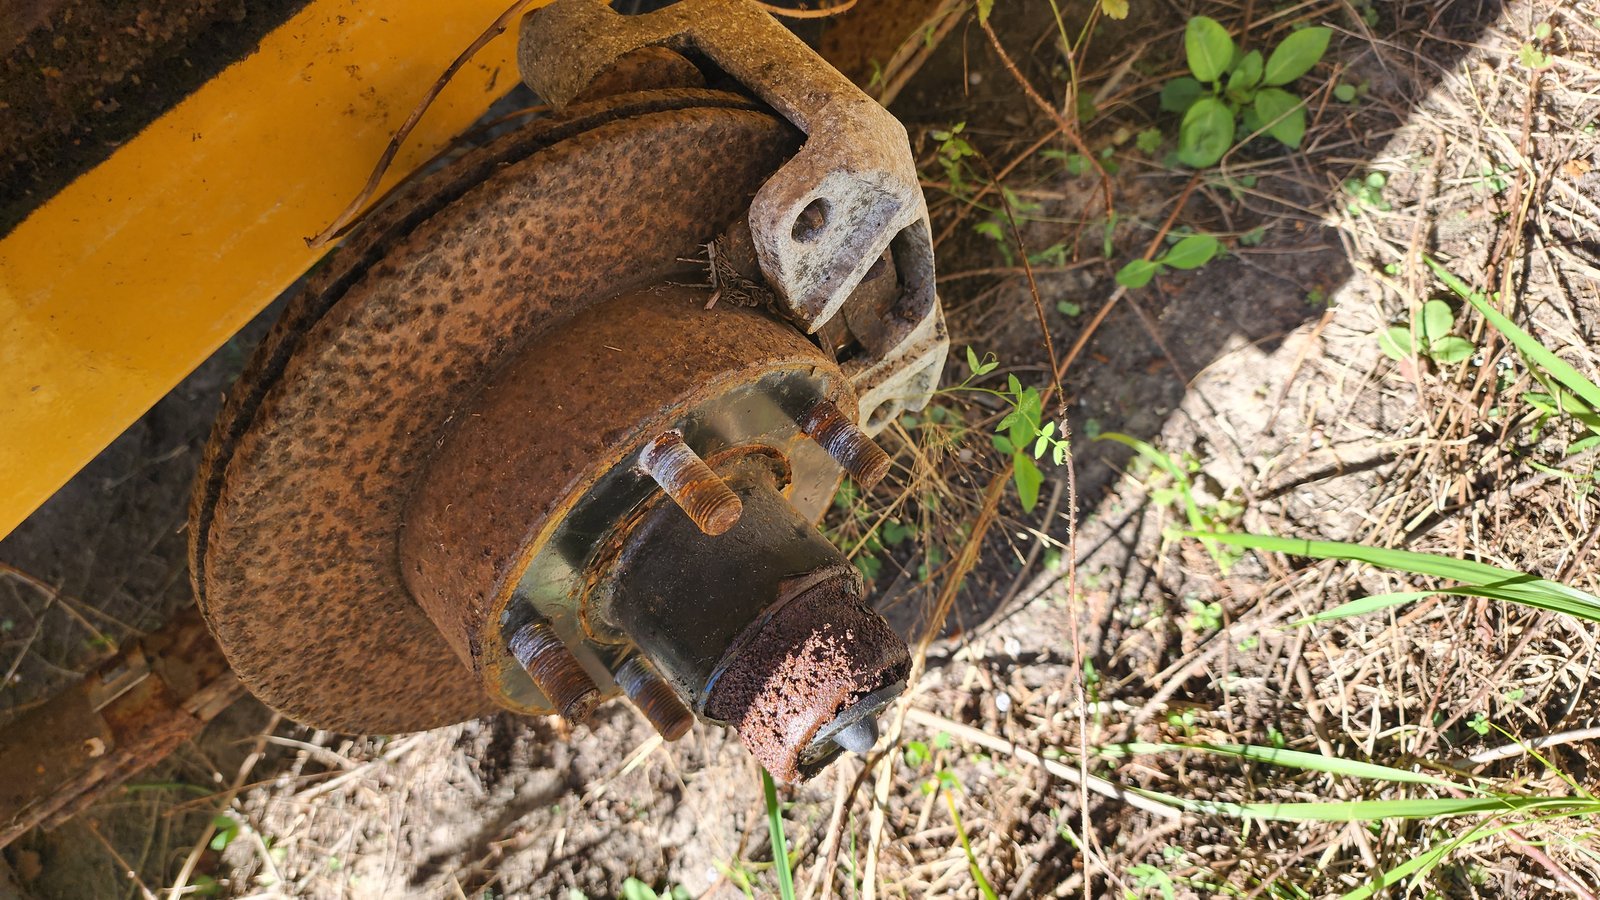
The trailer has disc brakes, and they look about how you'd expect after years of sitting outside. Both rotors are covered in rust, and the calipers are packed with leaves, pine needles and dirt. Looking edge-on through the caliper, you can see debris wedged right between the pads and the rotor.
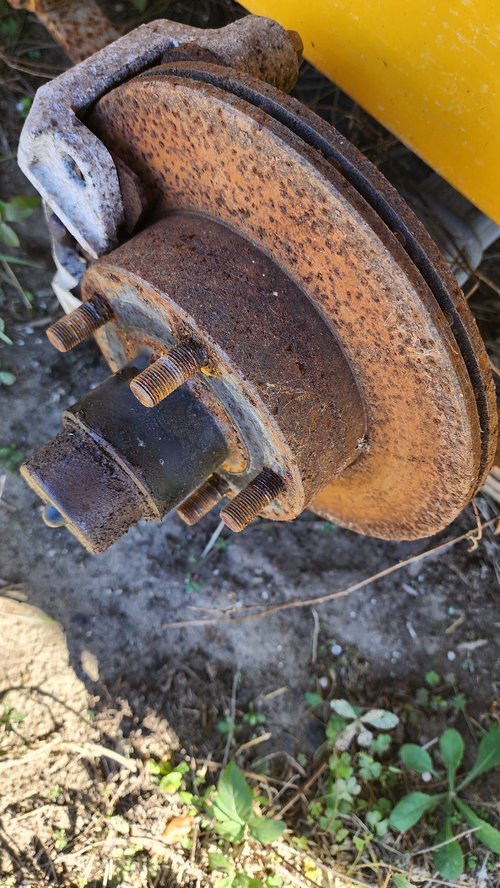
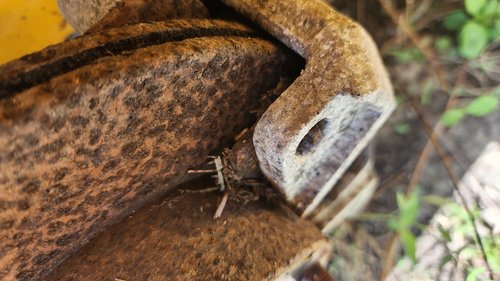
I spun both hubs by hand. The left one turns somewhat freely. The right one binds, which almost certainly means a seized caliper piston or pads rusted to the rotor.
Worth knowing: North Carolina doesn't require brakes on trailers under 2 tons, so replacing them is a choice, not a legal requirement. I'm replacing them anyway. Stopping a loaded boat trailer with only the tow vehicle's brakes isn't something I want to rely on. The plan is new calipers and pads on both sides, not just the one that's binding. Doing one side would leave the trailer pulling unevenly.
A few other surprises
- The fuel cap was off. I have to assume there's water in the tank. Before I even try to start the engine, the tank gets pumped out completely and a new water-separating fuel filter goes in.
- The registration expired in 2015. That gets renewed with the NC Wildlife Resources Commission before the boat goes in the water.
- The trailer frame is sitting on the ground. Lifting it means a bottle jack on a board under the axle near the U-bolts, cribbing under the frame as it comes up, and working one side at a time.
Getting rid of the old fluids
A project like this produces a lot of fluids you can't just dump. Here in Brunswick County:
- Oil, filters, antifreeze and gear lube go to the Southport or Leland convenience sites, or to the landfill.
- Old gasoline goes to the landfill.
- Oily bilge water gets soaked up with absorbent pads rather than pumped overboard or onto the ground.
What's next
- Identify the calipers. Look for a brand or part number on the caliper body, measure the rotor diameter and mounting bolt spacing, and check the axle rating, then find the matching kit.
- Pick up a torque wrench, a bottle jack and some wood for cribbing.
- Pull the old calipers and spin each hub to check the wheel bearings. Install the new calipers and pads, then bleed the surge brake system.
- Jack up the trailer, mount the new tires, and torque the lug nuts in stages.
- Pump out the fuel, then drain and check the engine oil and the gear lube.
Next update will be the brake job. If the bearings are bad too, it'll be a longer post.